Skyrim:Sightless Pit
|
|||
|---|---|---|---|
| # of Zones | 3 or 4 | ||
| Clearable | Yes | ||
| Dungeon | Yes | ||
| Respawn Time | 10 days or 30 days | ||
| Level | Min: 18 | ||
| Occupants | |||
| Falmer, Chaurus, Frostbite Spiders, Skeevers, Dwarven AutomatonsCC, The MessengerCC |
|||
| Important Treasure | |||
| Aevar Stone-Singer SunderCC WraithguardCC |
|||
| Console Location Code(s) | |||
| SightlessPitExterior, SightlessPit01, SightlessPit02, SightlessPit03, CCBGSSSE008VaultCC | |||
| Region | |||
| Winterhold | |||
| Location | |||
| South-southwest of Winterhold South-southeast of Saarthal |
|||
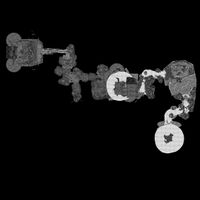
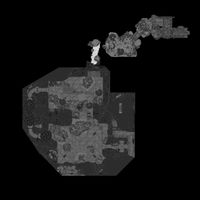
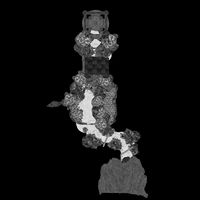
Sightless Pit is a medium-sized cave south-southwest of Winterhold containing Falmer and chaurus. It contains three zones: Sightless Pit, Temple of Xrib, and Abandoned Cave. A fourth zone, Sightless Vault, is added by the Sunder & Wraithguard Creation.
Unlike most caves, you must drop down into this cave, making it impossible to leave the way you came in and forcing you to traverse the entire cave to return to the surface. There are many vertical elements in the cave, and the creatures are all leveled.
Related Quests[edit]
- Legends LostCC: Track down Kagrenac's missing Tools.
Walkthrough[edit]
Exterior[edit]
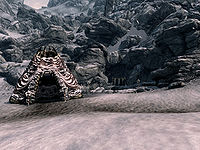
The entrance is west of the Shrine of Azura, and is marked by a single Falmer tent.
Sightless Pit[edit]
Upon dropping into the hole in the ground, you will find yourself at the edge of a large pool of water surrounded by icy walls, with a tunnel leading to the north. A search of the deep pool of water reveals nothing of interest. Following the tunnel, it passes a glowing mushroom on the right-hand wall, then turns to the east. A short way farther, it turns back to the north and opens into a cavern with a small camp. The camp consists of a campfire with three unowned bedrolls around it and three food barrels to the west, beside a flat-topped rock with a large coin purse, a pickaxe, a copy of the Pickpocket skill book Aevar Stone-Singer, and a sliced goat cheese on top. On one of the barrels is a bottle of alto wine and two bottles of wine. The cavern continues to the north, where a ledge descends around the walls of the cavern. Immediately below the camp on a ledge is an unlocked chest and a dead bandit pierced by numerous Falmer arrows. If you drop down to this ledge, be sure not to land behind the chest, as you may get stuck and have to reload a previous save. The path descends to a level below this ledge, where another two bandits' corpses can be found, presumably of the people who set up the camp. There are a few glowing mushrooms found throughout the cave.
The path continues heading west and turns to the south after a short way. Take care along here, as there is a pressure plate in the middle of the floor, on a darker patch, where it is harder to see. This triggers a spear trap that comes out of the ground in front. A few paces farther on, a Falmer hive is on the left-hand wall, with a leveled Falmer lurking inside. If the Falmer doesn't emerge (e.g., if you're sneaking), it is one of very few in the whole game that can be "extracted" by firing a ranged weapon into the hive.
The path turns to the west again, and the tunnel changes to Dwemer architecture. At the end of a short tunnel is a long dangerous drop, with a series of ledges you need to use to avoid severe damage or death. The final drop is onto a platform at the top of a curving ramp, where another pressure plate triggers a dart trap to fire from the wall behind you. The ramp curves around the shaft to another ledge, where a second straight ramp leads down to a ledge with a stone pool containing shallow water, with another ramp curving down from this ledge. Below is a leveled Falmer and a frostbite spider on a ledge, with a Falmer hive concealing another Falmer on the wall. A final curved ramp leads down to the ground and a corridor heading west with a track for a spinning blades trap down the middle. This trap has no activation mechanism, so using a shout normally used to evade such a thing will only attract the attention of enemies lurking just ahead.
The corridor descends a short ramp to a crossroads, with two Falmer, one of which is leveled, standing in a dead end to the left, just out of sight. Using Detect Life or the Aura Whisper shout may make it appear that only a single Falmer is standing there. There is an unlocked Dwarven chest ahead at the crossroads, and a corridor heading to the north from the chest, leading into another ice tunnel that turns to the west after a short distance. Ahead, it opens into a room of Dwemer construction, with a large staircase and a collapsed Dwarven centurion that cannot be interacted with. Three more enemies guard the top of the stairs, consisting of a magic-using Falmer, frostbite spiders, skeevers, and/or a leveled chaurus, depending on your level. The door at the top of the stairs leads to the second zone, the Temple of Xrib.
Temple of Xrib[edit]
The Temple of Xrib consists of a mixture of Dwarven ruins and frozen caves. Upon entering, a wide corridor rises to the west, turning north at the top before quickly turning west again. Through a short corridor lies a room guarded by a leveled chaurus, with a leveled Falmer patrolling a cylindrical tunnel in the room's southwestern corner. This tunnel, through which a Falmer tent is visible, leads into a large cavern. There is a hive on the wall to the left containing a Falmer, several more of which are farther into the cavern behind a rock wall to the tent's right and will be alerted by noise from fighting the first. The first tent, reachable by climbing an earthen ramp, has only a campfire inside, and a second empty tent lies to the right, along with a Falmer hive on the wall. Behind the first tent is an open pen with a few piles of chaurus egg sacs and a ledge (see bugs).
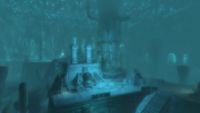
The path continues to the west, entering a tunnel that then turns to the south before opening into a massive mist-filled cavern, with wide stairs leading up to the south and a high ceiling that glitters like that of Blackreach, which itself is rivaled by the huge Dwarven structure before you. You can spend a lot of time exploring different ledges and corners in this cavern, but there is nothing of interest away from the main path. From the cavern's entrance, you can see the top of a Falmer tent at the top of the first flight of stairs. A magic-using Falmer and a chaurus stand to the right of the tent, which has a fire inside. Behind, there are more levels, with a distant pair of pillars several levels above the entrance. From the top of the first flight of stairs, you can see more stairs off to the west, with two more Falmer patrolling the top. Climbing the second flight of stairs reveals a Falmer tent to the right, containing a fire and an unlocked chest. To the south, an unlocked chest sits in front of a second tent. At the other end of this level, a third Falmer tent contains yet another unlocked chest. Between the second and third tents is a flight of stairs crushed by falling masonry. To the west, a path climbs a curving ramp.
The curving ramp on the path to the west leads to a lit corridor, where a magic-using Falmer and a chaurus are patrolling. There is an unlocked Dwarven chest to the left of the second hanging light, and beyond this, another curving ramp to a tower above, guarded by another leveled Falmer. There is a short ramp down to the east on the other side leading to the level with the two pillars seen from below. There are many more enemies on this level, including a boss-leveled Falmer, chaurus, frostbite spiders, or skeevers, so a Detect Life spell or the Aura Whisper shout is recommended. Killing the creatures before the Falmer may cause a unique spell with a red blast effect to activate on their bodies, which teleports them between the two pillars and revives them. In the middle of this level, at the rear between two pillars lies a smaller pillar with a large unlocked boss chest in front. To the east is another lit tower with a lift to the third zone, the Abandoned Cave.
Abandoned Cave[edit]
The Abandoned Cave is an unoccupied zone that serves as the exit for the cave. There is a short corridor to the south to a door that is barred from this side, preventing you from accessing the Temple of Xrib without first traversing the rest of the cave. The only items of interest in this area are a couple snowberry bushes and a few glowing mushrooms which can be harvested along the path. Exiting to Skyrim will bring you to a ledge overlooking the main entrance to the cave.
Sightless VaultCC[edit]
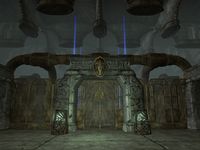
The Sightless Vault is a zone added by the Sunder & Wraithguard Creation. It is a Dwemer repository holding Sunder and Wraithguard, two of the three Tools of Kagrenac. To enter, you will need to obtain the Attunement Crystal during the quest Legends Lost.
At the end of the Abandoned Cave, place the Attunement Crystal on the Dwarven Pedestal to unseal the entrance to the Sightless Vault. The small corridor to the central room has a few glowing mushrooms, a white cap sample, and a bleeding crown sample. The vault consists of a large central room with two side areas. Sunder and Wraithguard are locked behind gates in the center of the room, and thus cannot be reached.
To begin unlocking the gates, you must first activate a Vault Release Valve at the back of the room. You must then solve two steam valve puzzles in the two side rooms, which will involve activating each valve several times until the steam travels in the right direction. Your goal is to direct the steam in the direction of the next valve, until you reach the end of the piping and your journal updates. You will need to fight two Dwarven spiders and two Dwarven spheres respectively after you solve each room. With this done, the door near the original Vault Release Valve will open, and an extremely powerful ebony-colored Dwarven centurion named the Messenger will emerge.
Once you defeat this final guardian, the gates will swing open, and Sunder and Wraithguard will be yours to claim. Before you depart, make sure you loot the chest in the room from which the Messenger emerged.
Notes[edit]
- There is an unmarked stone altar on the mountain above the cave entrance with a skeleton lying on it next to a copy of the Conjuration skill book The Doors of Oblivion. The skeleton on the altar can be exploited for unlimited gold. Touching anything will cause the skeleton to rise and two additional skeletons to reanimate from nearby bone piles. According to the Prima Official Game Guide, this location is called the "Altar of Xrib". It is unknown who or what "Xrib" is, but it may be something the Falmer worship.
- There are multiple places within the cave where followers can get stuck.
- At the large pool at the beginning, the follower might remain underwater indefinitely, and cannot be commanded to move out.
- At some of the dropping edges, the follower might keep attempting to jump down, but stay at the same location.
- Sightless Pit appears in Legends as a quest and a card.
Bugs[edit]
- Behind one of the tents in the Falmer camp near the start of the Temple of Xrib, you can walk up onto a small ledge with a glitched wall texture, allowing you to step out of the playable area and see farther into the zone. You cannot proceed any farther, however, and can only step back onto the ledge.
- Placing the Attunement CrystalCC on the pedestal and then leaving will cause you to lose both the crystal and access to the door it unlocks. ?
